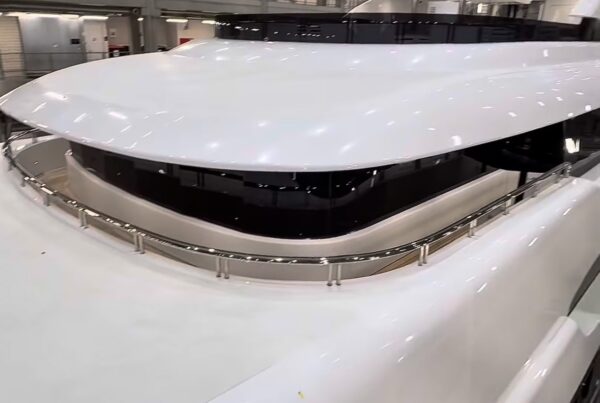
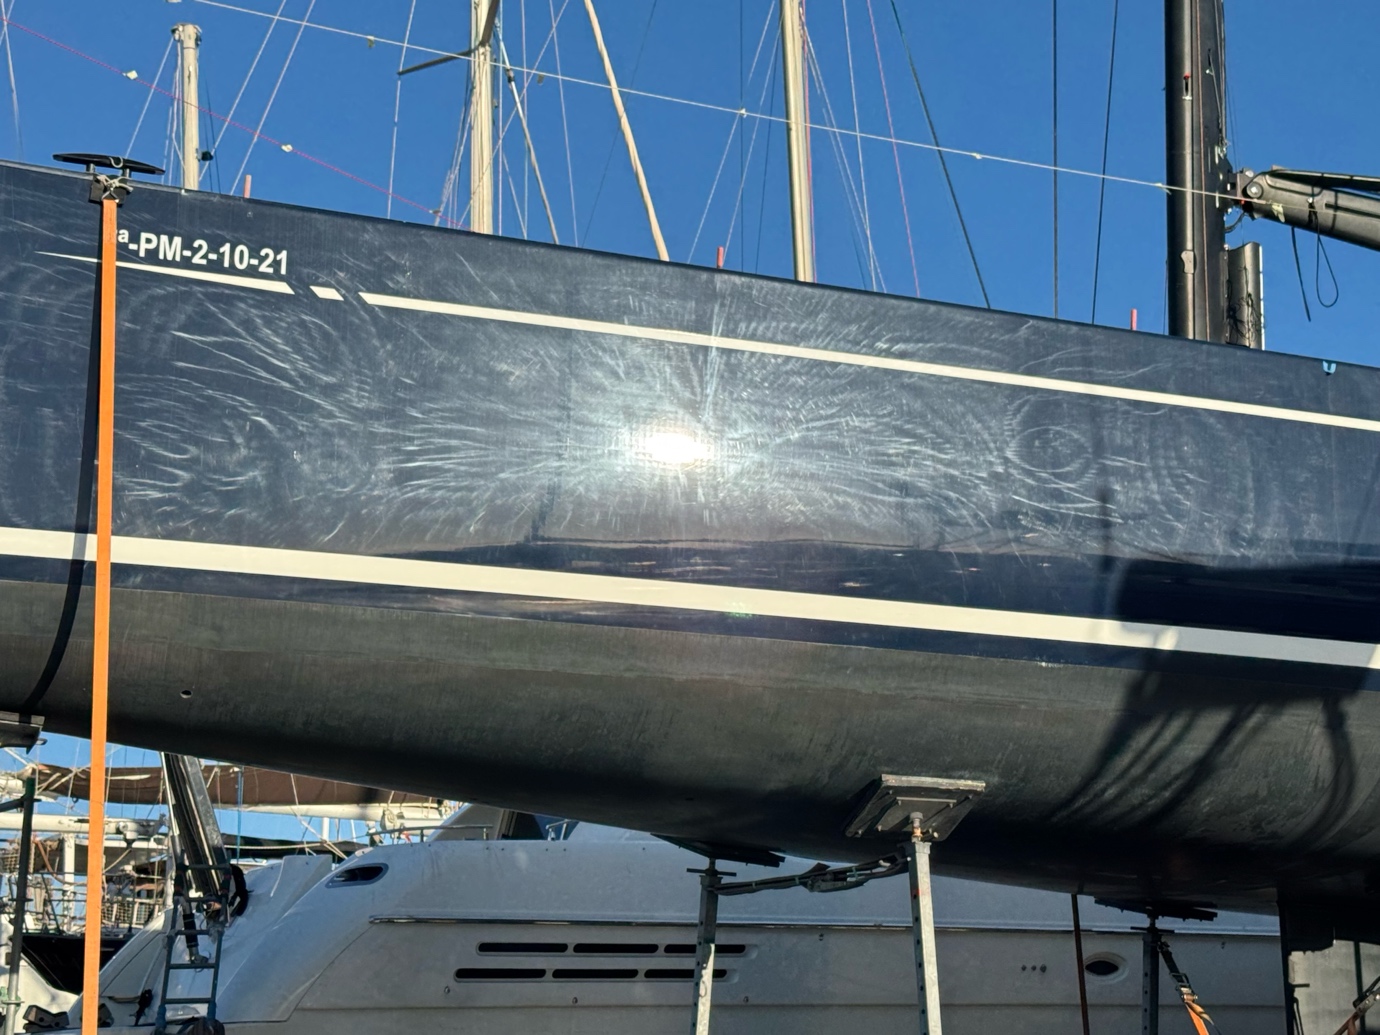
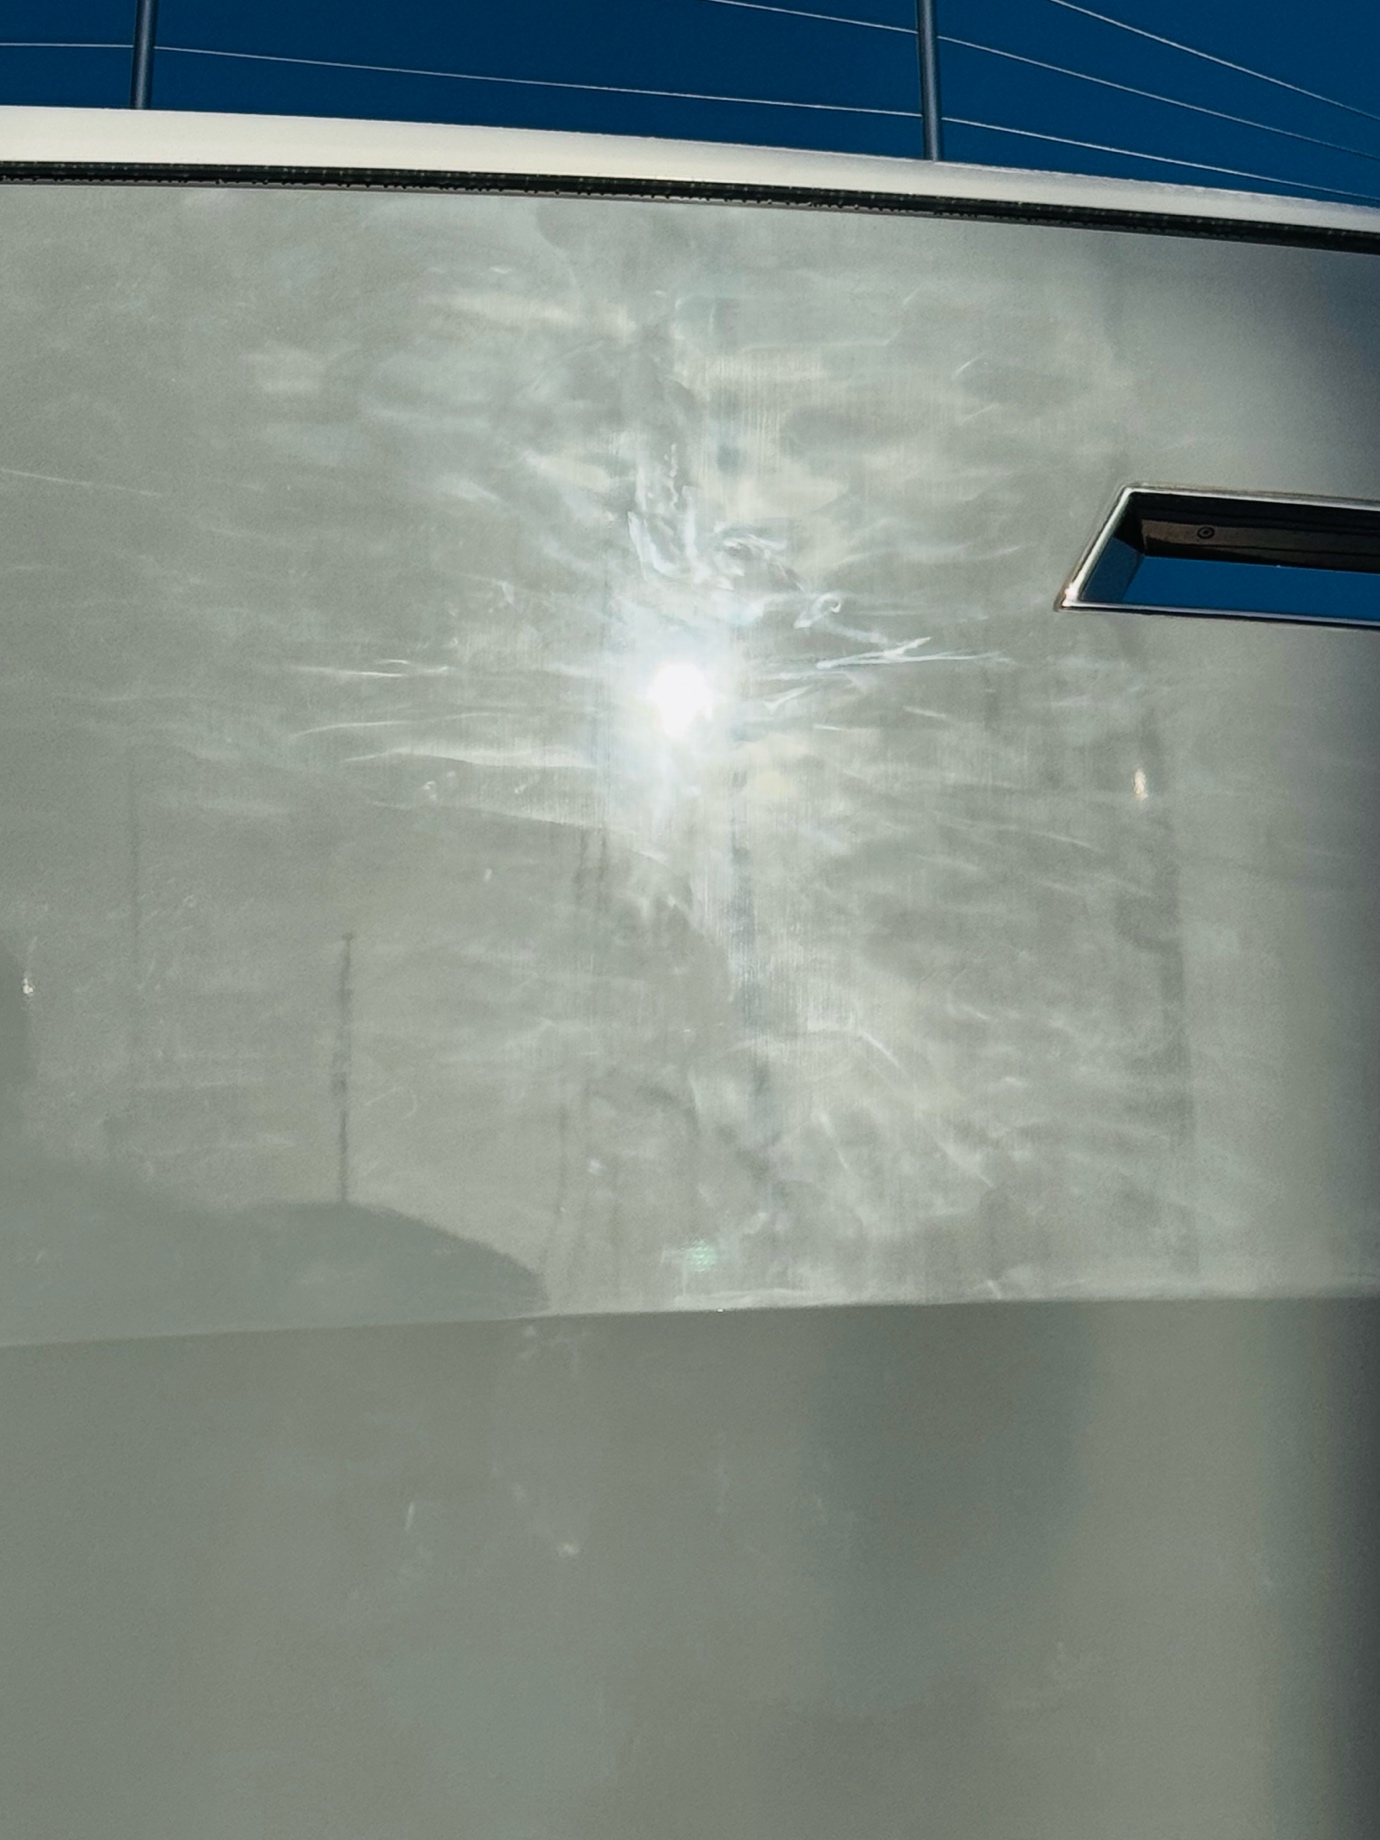
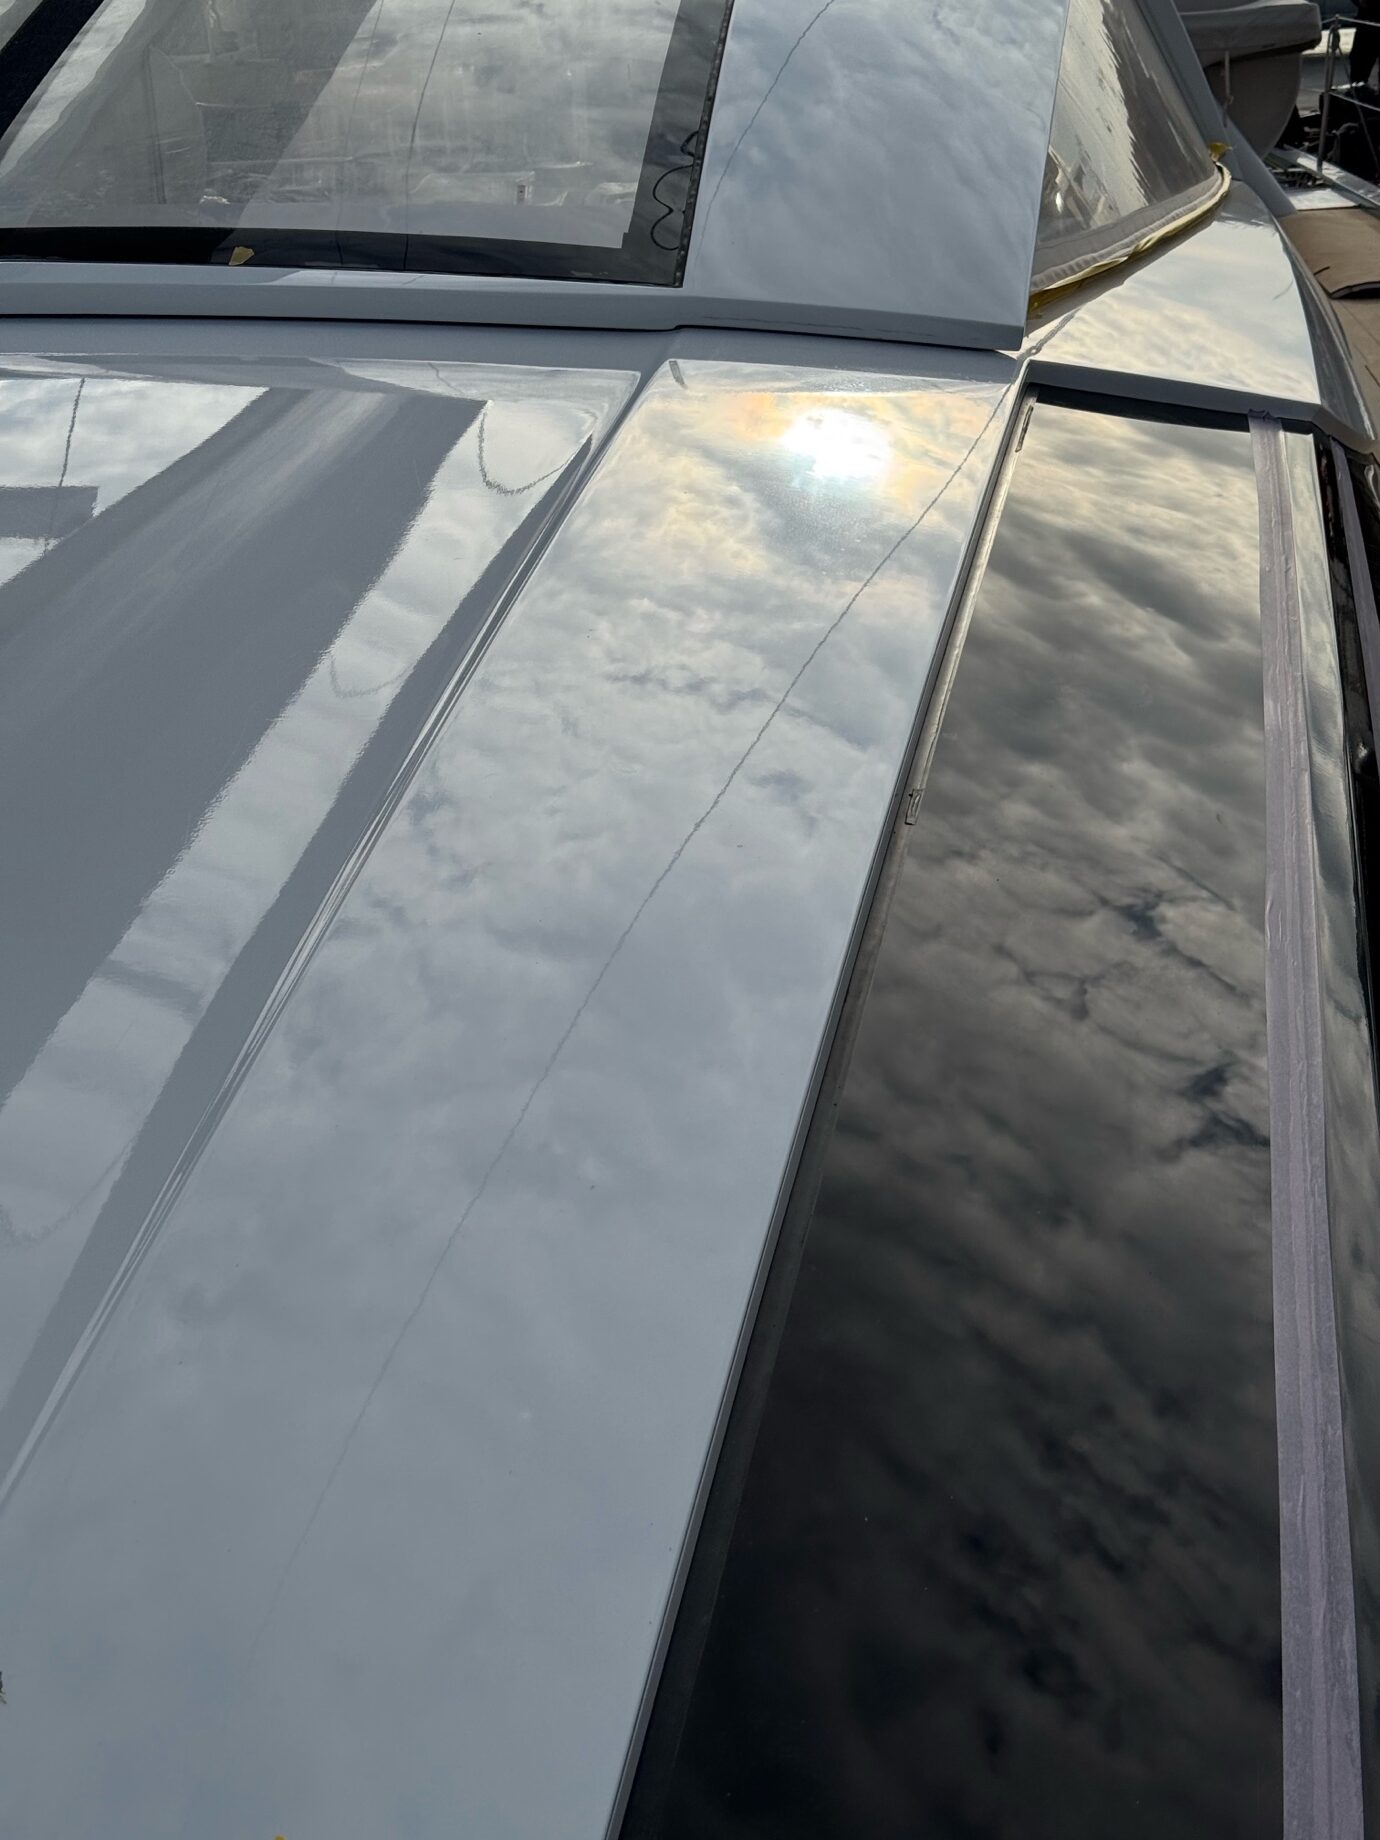
Achieving a flawless yacht finish requires more than just effort—it demands the right knowledge, tools, and techniques. Improper polishing can lead to holograms, swirl marks, and unnecessary paint damage, like the photo you see above, making the surface look dull instead of refined. In this guide, we’ll cover the essentials of professional yacht polishing that ensure a smooth, mirror-like finish without compromise.
Understanding Holograms and Common Polishing Mistakes
Understanding Holograms in Polishing
Holograms are faint, ghost-like patterns that appear on a polished surface due to improper technique or incorrect tool usage. These visual defects often result from:
– Using the wrong type of polishing pad, machine, or rubbing compound, or operating at an incorrect speed.
– Applying excessive or uneven pressure.
– Moving the polisher too quickly or inconsistently.
– Failing to properly clean the surface before polishing.
– Using overly aggressive rubbing compounds on dark-colored paint.
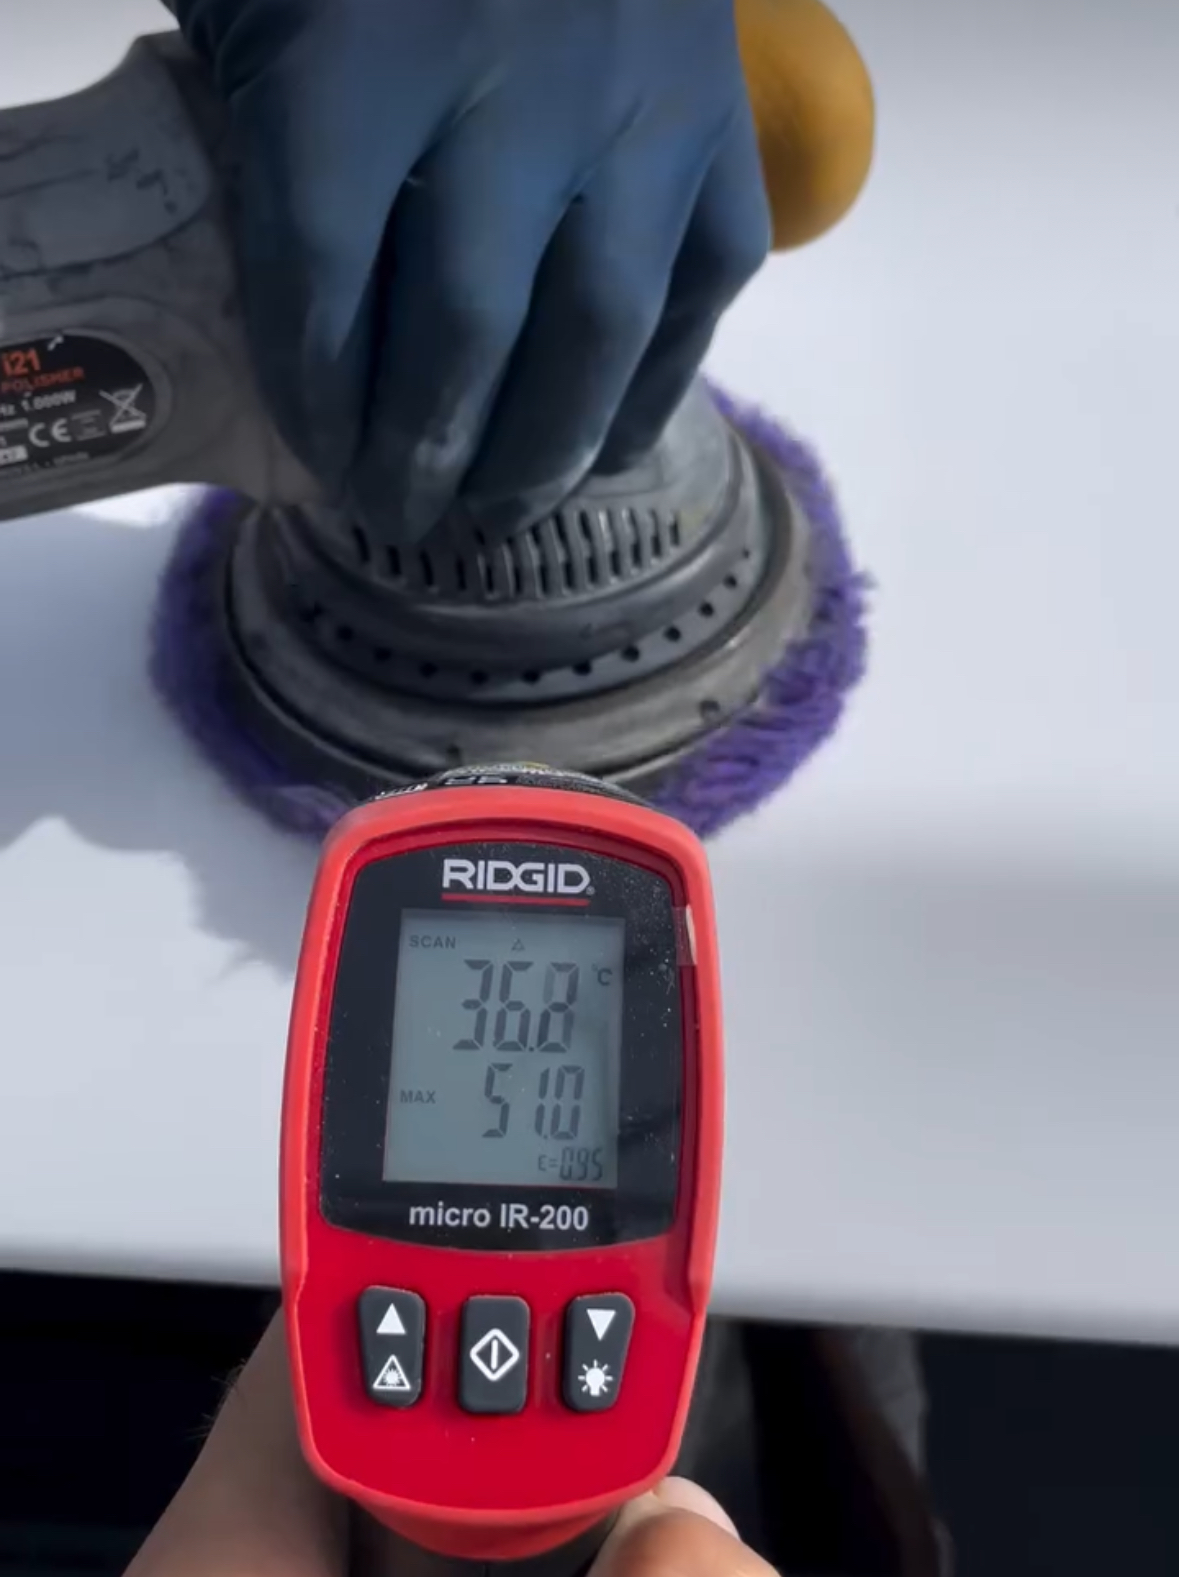
– Polishing in high temperatures, such as during summer under direct sunlight, which can cause overheating of the substrate.
Choosing the Right Polishing Machine
There are two main types of polishing machines: rotary and dual-action (DA) polishers.
- Rotary polishers provide higher cutting power and are commonly used for heavy correction work, but they require more skill to avoid overheating the surface or leaving holograms.
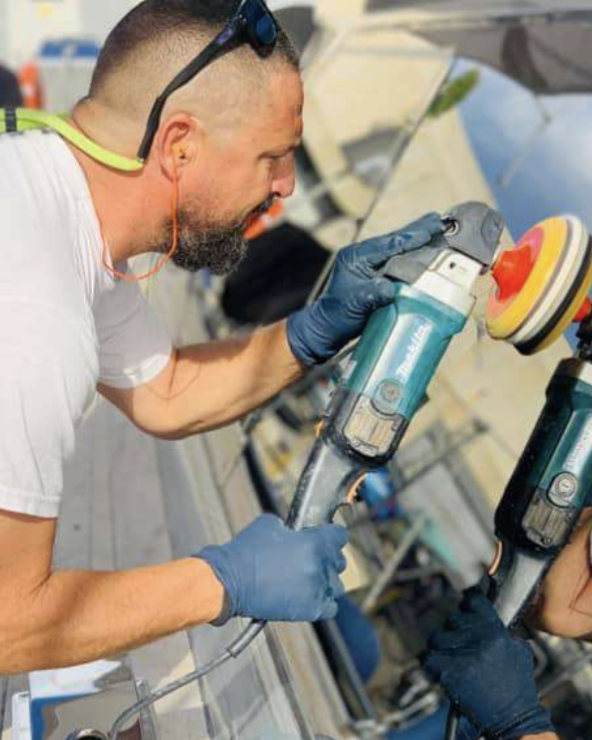
- DA polishers are more forgiving and ideal for finer polishing, reducing the risk of swirl marks and excessive heat buildup.
Selecting the Proper Pads and Compounds
Your choice of pad and compound will significantly impact the final result.
- Pads:
- Wool Pads: High-cutting power, ideal for removing heavy oxidation or deep imperfections.
- Foam Pads: Available in different densities, from aggressive cutting to ultra-fine polishing.
- Microfiber Pads: Great for both cutting and finishing, depending on the type used.

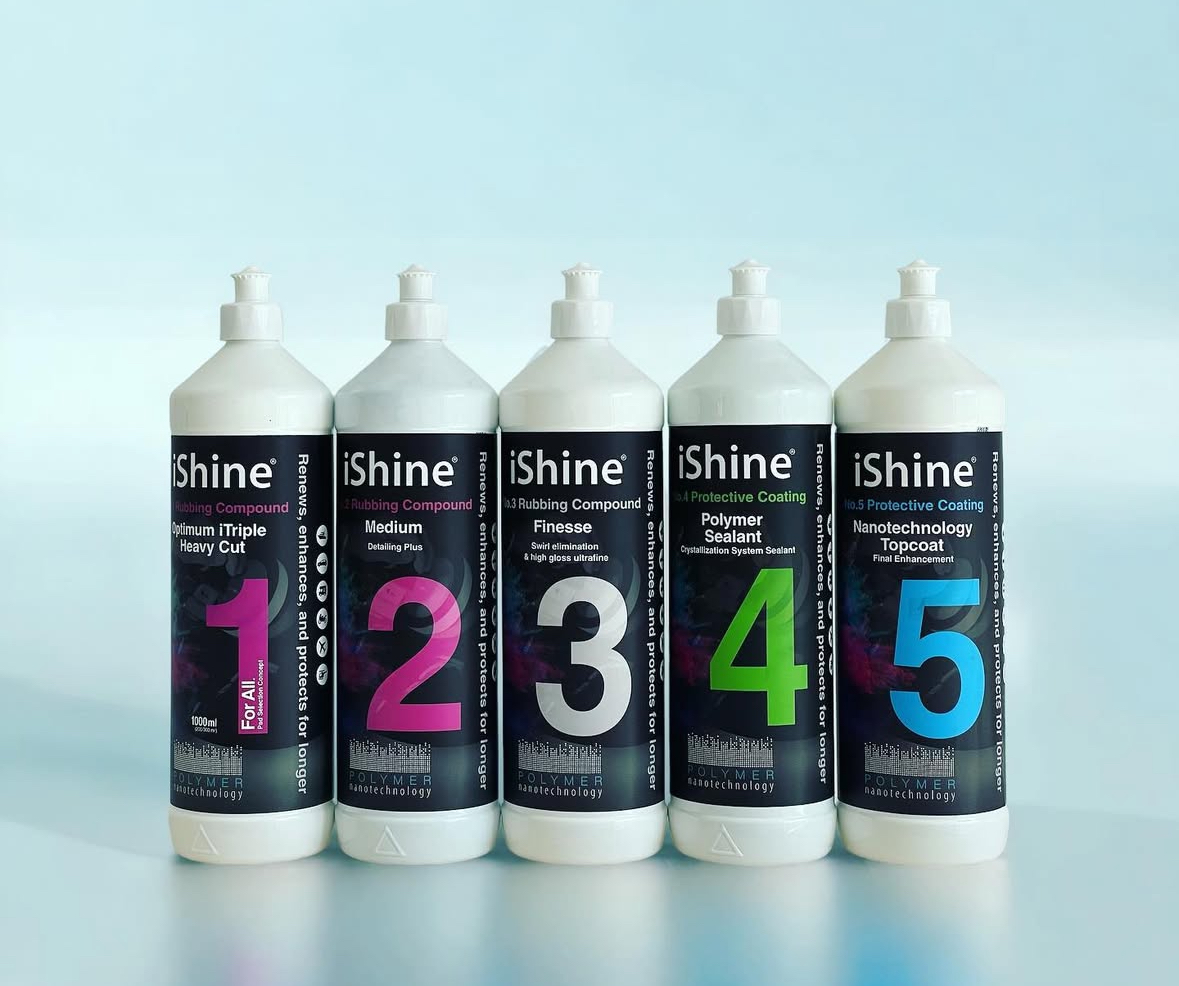
- Compounds:
- Heavy-Cut Compound: Designed for removing deep scratches and oxidation.
- Medium Polish: Suitable for refining the surface after cutting.
- Finishing Polish: Helps achieve a high-gloss, swirl-free finish.
The Step-by-Step Polishing Process
- Surface Preparation – Wash and decontaminate the surface to remove any dirt, grease, or residues.
- Choose the Right Combination – Match the pad and compound to the level of correction needed.
- Work in Sections – Apply the polish in small areas, using slow and controlled passes.
- Apply Even Pressure – Let the machine and compound do the work; avoid excessive force.
- Check Your Work – Wipe down the surface frequently to monitor progress and adjust techniques as needed.
- Wash-down and degrease the surface to make sure no rubbing compound residue is ledr on the paint.
- Seal and Protect – Once polished, protect the finish with a polymer sealant or ceramic coating to maintain the shine and longevity.
The Key to Long-Lasting Results
Proper polishing isn’t just about achieving immediate results—it’s about maintaining them. Using high-quality maintenance products and washing techniques will extend the life of your yacht’s finish while reducing the need for frequent correction.
By following these techniques, yacht crews and owners can ensure a pristine, swirl-free finish that enhances both aesthetics and long-term protection. For more information get in touh with iShine Coatings Group.